Metallic Gold Chocolate + Giveaway

Tags

, , , ,

Ahoy there, bakers!

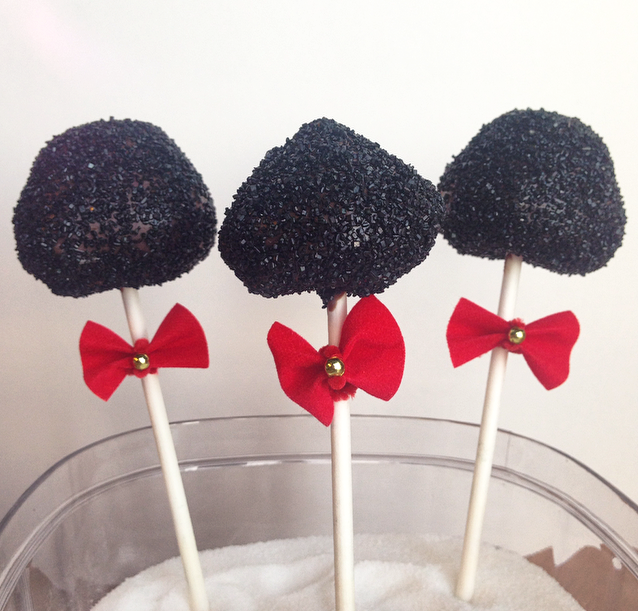
I was recently asked if I could make some nautical cake pops for a friend. I started brainstorming ideas, and came up with a fun design that I was really excited to make… then the friend changed their mind. D’oh! The idea was stuck in my head, so I went ahead and made them anyways to share with you!

Whenever I need a specific shape for a cake pop add-on, I immediately reach out to my friend Ella, of Lollicakes By Ella. The original mold queen, Ella has shapes of EVERYTHING!

1_gold highlighter dust

Looking at the two molds, I thought for SURE that the wheel would give me the most trouble. However, I was so wrong. The anchor mold and I were fast frenemies.

I was so gentle. The first one broke, OK, rookie mistake – there’s always a learning curve with new molds. I was really careful with the second one, and it broke again – son of a cupcake. OK, here we go, third time’s the charm, right?

I took a deep breath, thought zen-like thoughts, wooosahhh… Snap! Mom always warned me, “What’s two’s is three’s.”

2_broken anchors_memes

Eventually, le’ anchor decided to play nice and start working. And thank goodness, check out how cool it looks in one piece! 🙂

3_gold chocolate  anchors

How did I get it so shiny & gold you ask? Gold highlighter dust from Lollicakes by Ella.

Highlighter dust, which also comes in silver, is a powdery substance that you can brush on chocolate, fondant or gumpaste to give them a beautiful, metallic look.

When working with small chocolate pieces, the natural heat from your hand can melt them quickly, so I used one small brush to hold the piece in place, while I dry-brushed on the highlighter dust with the other.

5_gold highlighter dust

Note that it is called “highlighter” dust, meaning that it accentuates the base color that it is applied to. When working with chocolate, the color of the candy melts will have an effect on the hue of the gold:

  • White chocolate = pewter-like light gold
  • Yellow chocolate = true yellow gold
  • Dark chocolate = brassy, antique gold

4_gold ship wheels chocolate

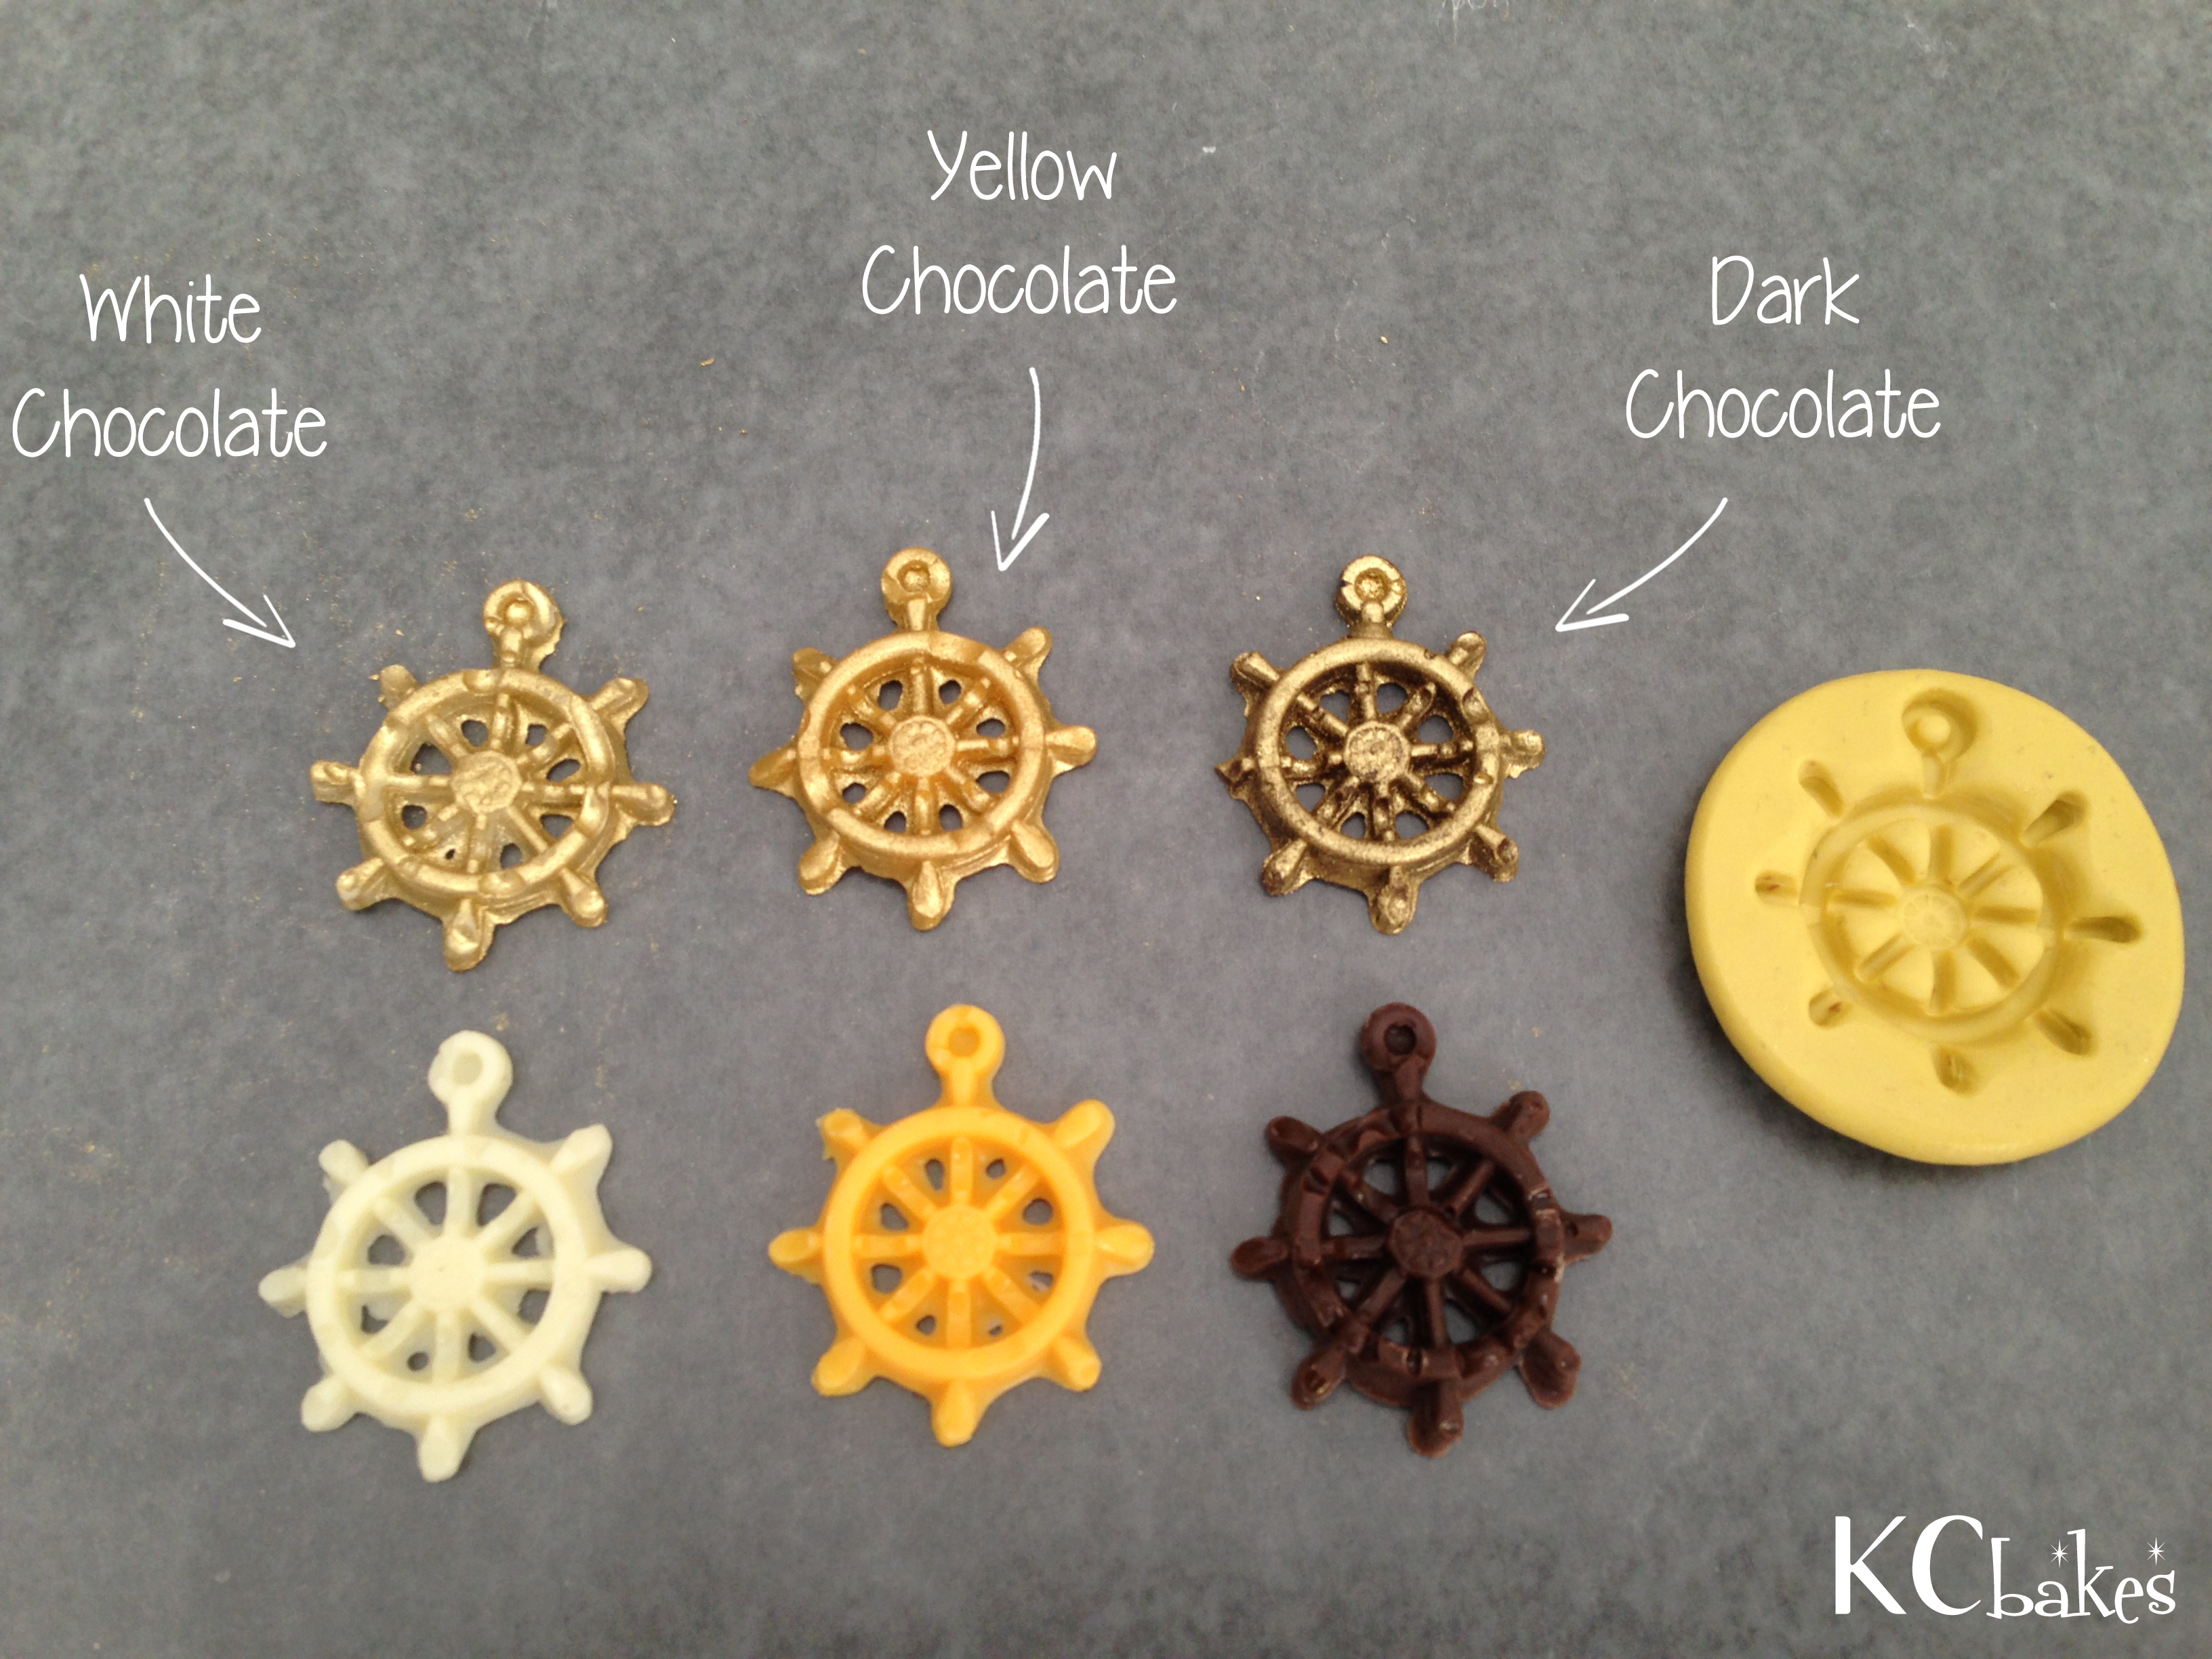
People often ask if the dust makes the candy taste funny… after this post, I ate a few of the wheels and didn’t notice any strangeness – they just tasted like regular chocolate.

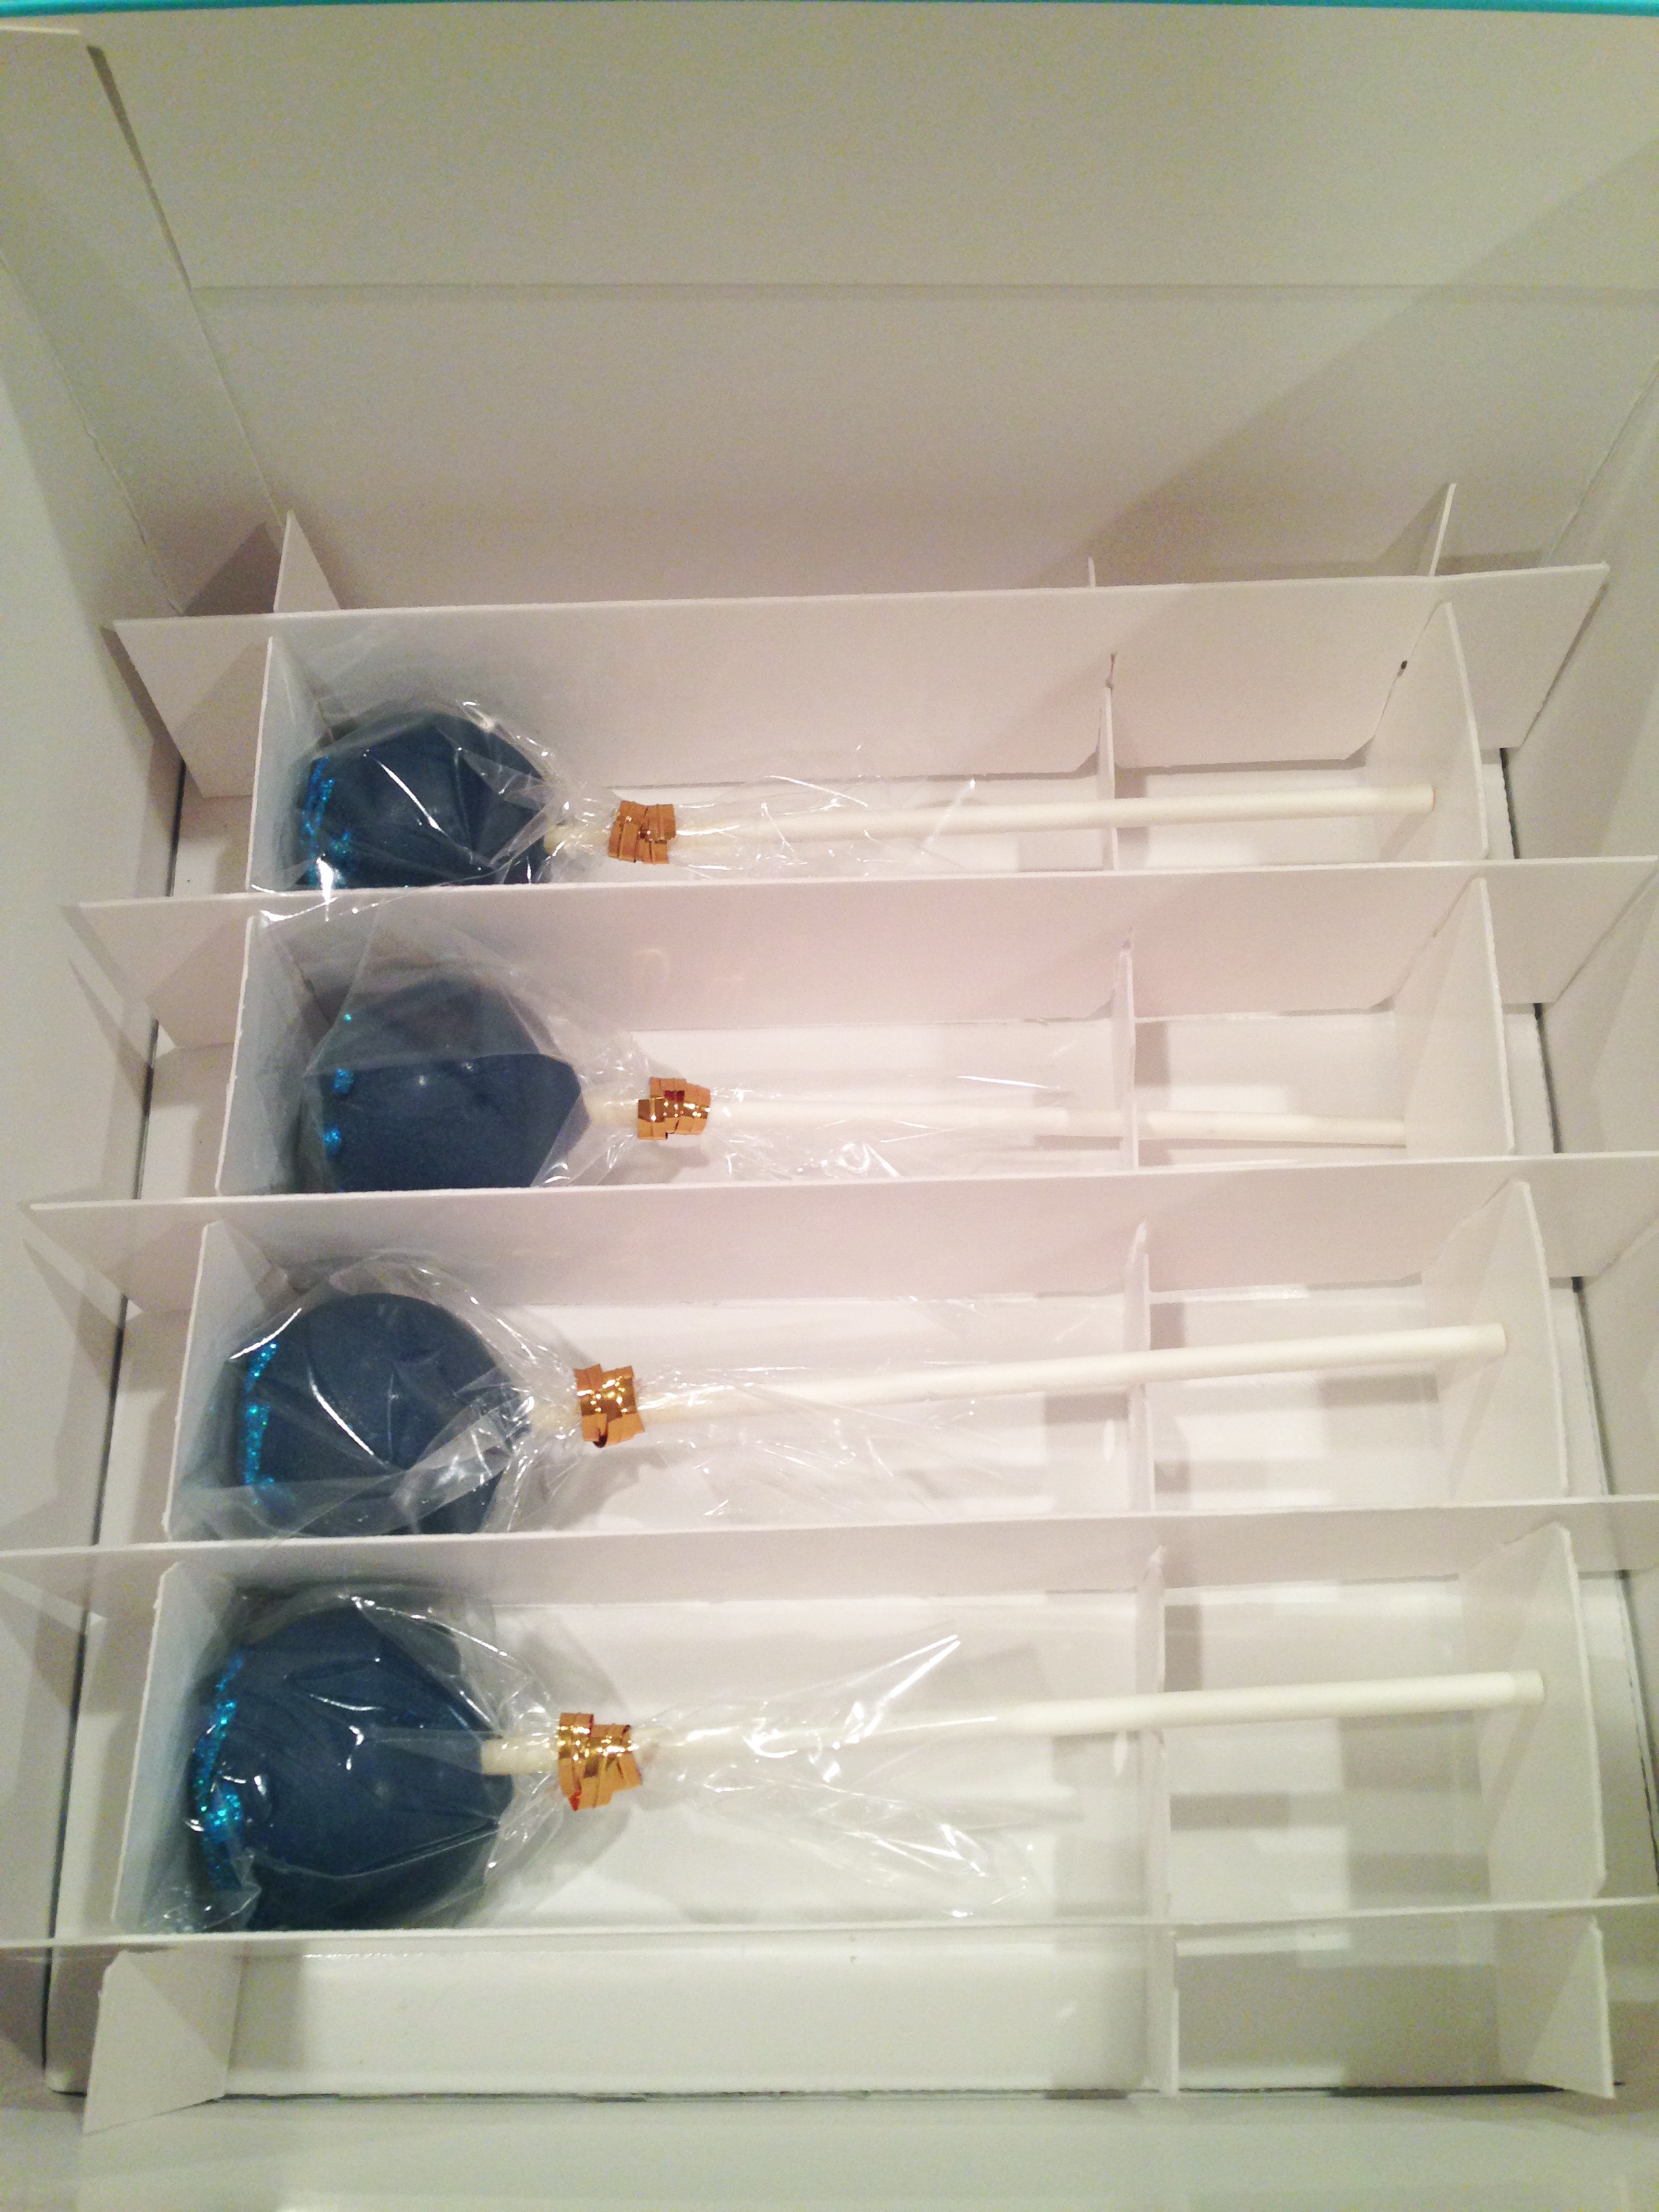
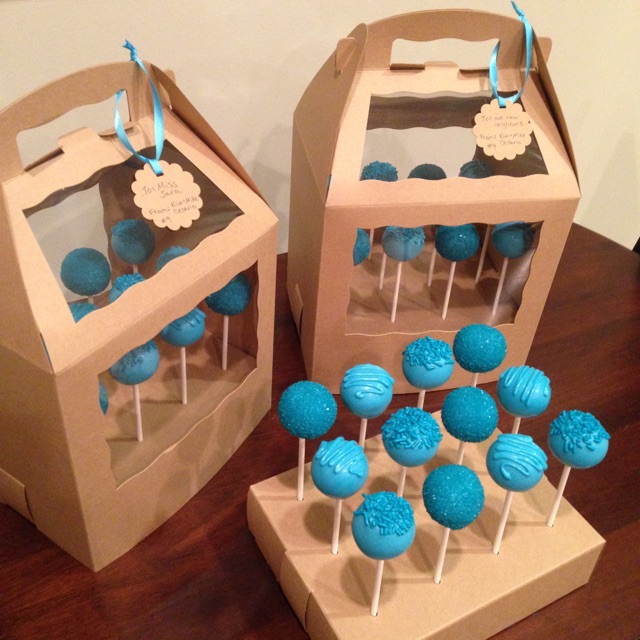
Back to the pops… I made basic, navy blue cake pops and used gold striped straws from Sweets & Treats Boutique.

Pipe some melted chocolate to the back of your new gold pieces and attach them to your cake pops for a beautiful, polished look! [Displayed in a KC Bakes Paper Straw stand]

6_nautical cake pops

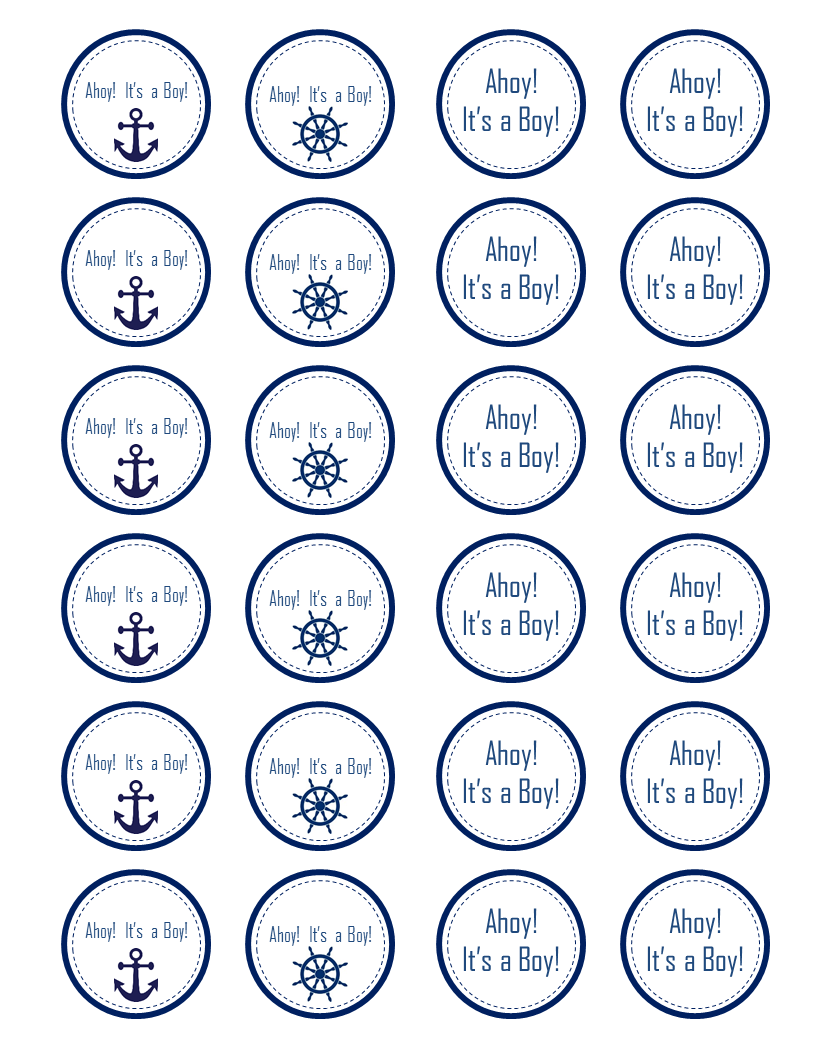
Bonus! Nautical cake pops are a great theme for a baby shower for moms expecting little boys. Enjoy these FREE Printable Tags, download in PDF: Ahoy Its a Boy.

Ahoy Its a Boy

Now, for the GIVEAWAY!

One lucky KC Bakes reader will win a Lollicakes By Ella Prize Pack worth $87!

To enter… visit www.kcbakes.com/giveaway

Deadline: Thursday, March 26th at 11:59pm EST!

IMG_6260Disclaimer: there’s often concern and confusion over the labels “non-edible” and “non-toxic” regarding highlighter dust, luster dust, disco dust, etc.

  • Non-Edible indicates that the product has no nutritional value (i.e. calories, fat, cholesterol, etc.). It is not intended for mass-consumption, such as eating a spoonful of it. The amount of dust needed to cover a chocolate piece is very small.
  • Non-Toxic indicates that it is not harmful if injested.

How to Ship Cake Pops

Tags

, ,

We all love to share our cake pops on Instagram and Facebook, right? But then, do you get the question, “Do you ship?”

So many people opt not to ship their cake pops because they don’t know how to package their cake pops properly for them to arrive safely to their customers.

Liz Walker, from Cake Pops by Liz, has developed a great solution… Cake Pop Inserts!

IMG_4054

These FDA food-safe cake pop packing inserts give each cake pop their own individual little compartment.

The great thing about these inserts is that you can use them to stack vertical layers of cake pops. Simply use a piece of cardboard or cake pad in between the layers of inserts.

IMG_4056

For the best overall support, alternate the direction of your inserts between layers, to build a supportive internal structure. This way, the outside box, cardboard layers and the inserts bear the load of external pressure – keeping your cake pops smush-free.

Layer Graphic

No more fussing with messy shredded paper, crinkle paper, bubble wrap or other materials to package your beautiful cake pops! There are even holes to put the sticks in, to hold them in place!

IMG_4065

Be sure to start and end your layering with candy pads, to give the bottom and top layers of cake pops some extra cushion. Candy pads come in various shapes, sizes & color – try these from Nashville Wraps (click here).

One dozen cake pops are layered safely inside this box! It’s always a nice surprise for the customer to open their package and see a beautiful presentation… little details like that make for a memorable first impression.

IMG_4060

When using Cake Pop Inserts for shipping cake pops, Liz recommends placing cushion or padding around the outside of the cake pop box, such as thermal box liner (as shown below) inside the shipping box.

Thermal liners are available from Uline in various dimensions (click here).

IMG_4062

Place your box of cake pops inside of the thermal liner, and it seals with a self-adhesive strip.

IMG_4063

Then, place the box of pops inside of the shipping box. If you have gaps in between the pop box & shipping box, fill it with some padding for extra cushion.

It’s always a good idea to mark the outside of the box with FRAGILE stickers, or HANDLE WITH CARE.

IMG_4064

I shipped my pops from New Jersey up to some friends in Massachusetts, who sent me this picture when the package arrived. Happy cake pop eaters! 🙂

2015-03-13_14.22.18

To learn more about cake pop insert packaging, visit Liz at…

Facebook: Cake Pop InsertsInstagram: Cake Pop Inserts

Or purchase directly from her Etsy Shop: Cake Pop Packaging

Easter Nest Cookie Cups

Tags

, ,

This tutorial is brought to you by one of my very dear friends, Jessica, of Sugar & Spiked:

In the words of Cookie Monster, “Me like cookies, om, nom, nom, nom!”

So when I stumbled upon a neat baking pan called, Bake a Bowl, I was like a kid in a candy store.  I immediately thought of all of the fun cookies I could bake and create.

I was in a rush that day, so decided I’d come back later for the pan.  However, that didn’t happen and over the next few weeks, I just kept thinking about the pan and what I could create with it.  So, imagine my surprise when I popped into my local grocery store last week and saw one sitting all by its lonesome near the Pyrex section.

I couldn’t contain myself and grabbed for it, elbows ready, just in case someone else went in for the pan. I shoved it into the basket somewhere between the cereal boxes and the eggs in hopes that my boyfriend wouldn’t notice that I was buying MORE baking supplies!

As he was unloading the cart, he eyeballed it, and looked up at me with questioning eyes.  I simply shrugged my shoulders and went back to my US Weekly as if it was a perfectly normal purchase at the grocery store.  I slyly added that I’d be making chocolate chip cookies (his favorite) that weekend.  He never mentioned the pan again. 

With Spring right around the corner, I decided to create some cute Easter themed treats.  Something bright and colorful to help wash away all of those cold grey winter days.  So let’s get started!

Here is my new pan, isn’t she a beauty? It has 2 pieces, one for the dough and the other to sit on top to create the indent for the bowl (to make this really easy, let’s call them the bottom and top pans):

easter-cookie-cups-1

The options for this pan are endless (think bread bowls and pot pies…oh my!) but for my first go, I went for a classic chocolate chip cookie.  I used the Nestle Toll House recipe and omitted the nuts because we aren’t a fan of them in our cookies, and I don’t think the bowls would bake as smoothly with them in there.

easter-cookie-cups-2

Once the dough is ready, place the dough in each cup of the bottom pan to the easy to read “Fill line”

easter-cookie-cups-3

Then place the top pan on top of the bottom pan.  The top pan has these lips on the sides that fit perfectly into the slots on either side of the bottom pan.

easter-cookie-cups-4

I let them bake for a little longer than a normal cookie because each bowl is filled with enough dough to make about 3 regular sizes cookies.  I baked for 18 minutes at 375, took the pan out and let it cool for about 5 minutes.

However, when I removed the top pan, I realized that although the cookie was formed perfectly, the bottom of the cookie wasn’t fully cooked through so I placed just the bottom pan back in the oven for 5 more minutes at 350. That worked perfectly and allowed the cookie cup to bake through.  Once they were done, I let them cool for at least 30 minutes to an hour before adding my decorations.

Depending on what you are filling them with, in this case, buttercream frosting, make sure they are at room temperature so they won’t melt your decorations.  I bet they’d be delicious served warm with ice cream though!!  Om, nom, nom, nom.

Now for the decorating… SUPER easy!  I colored my buttercream frosting green and topped it with Bakerella’s green candy shred, found at AC Moore and cute egg shaped candies I found at The Fresh Market:

easter-cookie-cups-5

And voila, here is the final product:

easter-cookie-cups-6

What a cute, easy and affordable Easter treat.  Easy enough for the kids to help and delicious enough for everyone to enjoy!  They’d make cute place cards too!  Just use an edible marker to write the person’s name on an egg and place it on their plate.

BONUS:  Since St. Patty’s day is coming up, I went ahead and made some cute Cups of Gold too!

easter-cookie-cups-7

Just fill with your favorite filling, top with gold candies (in this case, gold dragees and gold disco dust) and top with a shamrock or a rainbow candy such as an airhead.

easter-cookie-cups-8

Aren’t they cute? And look at that chocolate-chippy goodness…

easter-cookie-cups-9

I love the possibilities for these bowls, or cups as I affectionately nicknamed them.  The options are endless and their ability to hold your favorite filling (think frosting, ice cream, pudding or even a mini deep dish pie), making it a fun and easy way to experiment with your most beloved recipes.

Enjoy!

SFCPMU Swag Bag Giveaway

Tags

, ,

Since it’s been SO cold on the East Coast lately, I was extra excited to fly out to San Francisco this past weekend to host my sixth event, the San Francisco Bay Area Cake Poppers Meet-Up! Search #SFCPMU on Instagram for pictures from the event. 

The event took place in San Bruno, in two parts. First, we all gathered at Sahaara Mediterranean Cuisine. We started off with an ice breaker so everyone could get to know each other while sharing stories about why they started making cake pops, the biggest order they’ve ever had, and other fun topics.

SFCPMU-28

After lunch, Fairytale Brownies co-founder Eileen Spitalny lead a great talk, covering a number of interesting marketing topics such as establishing your mission, protecting your brand, and so on.

SFCPMU-93

Before departing for our next location, we raffled off some amazing prizes. Click here to see our Facebook Album of all of the lucky prize winners.

SFCPMU-63

We all headed over to Busy Baker Supplies, where the attendees were divided into four stations. Every 30 minutes, they rotated around, which allowed for more in-depth conversations in a smaller setting.

  1. Troubleshooting Cake Pop Problems with Kris of goods by kCreative
  2. Business Topics with Eileen of Fairytale Brownies
  3. Cake Pop Photography with Karyn of Pint Sized Baker
  4. Free time to shop Busy Bakers store

Then we had one extra special raffle prize… a KitchenAid Artisan 5-Quart Stand Mixer! Attendees posted Instagram selfies, which resulted in some really cute (& wishful) photos – baker Yhami L. was the lucky winner!

Mixer

Now for the big giveaway!!!

One lucky KC Bakes reader will not only win an SFCPMU Swag Bag, but they will also win a special prize pack from Madesmart!

madesmart raffle

What’s in the swag bag you ask?

IMG_3805 (1280x853) (2)

And a portfolio full of BRP Box Shop swag! (photo credit: Yhami’s Cakepops)

brp box shop swag

SFCPMU Swag Bag Goodies

To enter the giveaway, visit KC Bakes’ website & use this secret code: SanFran2015

Click here to enter —-> www.kcbakes.com/sfcpmu

Deadline to enter: Sunday, March 1 @ 11:59pm EST – limited to US residents only

Won’t You Be My Neighbor?

Tags

, ,

Greetings everyone!

I hope your new years are off to a fantastic start! I had an incredibly busy holiday break… if you follow me on Instagram, you know that I bought my first house! It’s been very exciting, and very hectic.

I’m sure it comes as no surprise that my favorite room in the house is… the kitchen!

kitchen

When meeting new neighbors, one question that tends to come up is, “so, what do you do?” If I was going to say that I like to bake, I couldn’t do that empty handed… so to “break-in” the new kitchen, I made a batch of cake pops to bring with me for introductions.

A few days after we moved, I flew down to Miami with my friend for a little girls getaway weekend. The trip had been planned for a few months. We were originally supposed to settle in November, but you know, delays are inevitable.

Now, we live in cold, grey, snowy New Jersey. The day we flew out, it was 19 degrees. This view from our hotel was SUCH a welcomed, and well-needed sight.

Miami Beach

One of the first things I was looking forward to doing in Miami is visiting Sweet Life Cake and Candy Supply!

Sweet Life Cake and Candy Supply

I have known these lovely, super-sweet ladies for quite some time through the phone and social media. Melanie (L) and Natasha (R) have been big supporters of my KC Bakes Meet-Ups – it was so much fun to see them in person!

Sweet Life Cake and Candy Supply

While I was there, I did some shopping around their store – they have such a great selection of colors! I’ve been really into teal lately, so I stocked up on goodies in various shades of blue.

Sweet Life Cake and Candy Supply

Look at this Caribbean Blue disco dust! The photo doesn’t do it any justice… it shimmers so beautifully in person, just like the blue waters of the Caribbean.

Sweet Life Cake and Candy Supply Disco Dust

So! Back to cake pops for the neighbors. Not knowing their favorite flavors yet, I chose to go with a simple French vanilla cake. (Tips for Super Smooth Cake Pops)

cake balls

Wanting to use some of my new supplies, I pulled out the Teal Decorettes and Teal Sanding Sugar. The blue candy melts I used for these pops are from Bakerella’s line for Make’n Mold.

Blue Cake Pops

It was fun to mix & match textures, but have them still be all the same color! (shop cake pop stands at www.KCBakes.com)

To deliver my pops, I pulled out my favorite cake pop boxes from BRP Box Shop. They also come in white, but I love how the light brown really brought out the vibrant blue color of the cake pops!

IMG_2550

Sweet Life Cake & Candy Supply have an awesome online store – but – it’s supposed to snow 3-6″ here on Saturday… I think I may just “need” to go shop in person! 🙂 *I wish!*

No-Bake “Lumps of Coal” Oreo Pops

Tags

, , , , ,

Happy Christmas Eve! Does anyone have any shopping left to do?

We have one last awesome tutorial to rounding out our Cake Pop Con attendee series. Janae from Nae B. Sweets came up with a no-bake, 2-ingredient cake pop idea for those people on Santa’s naughty list.

No Bake Oreo Lumps of Coal Cake Pops

If you don’t like to bake, this is the cake pop for you! A no-bake cake pop made of Oreos. No matter the customer, these Oreo cake pops are always a favorite.

When I was thinking of the perfect gift to make for my son’s friends at day care, a naughty and nice bag came to mind. Each child had two cake pops in their bag; one naughty cake pop and one nice cake pop. For the naughty cake pops it only made sense to make lumps of coal and I couldn’t resist making two of my favorite flavors, Oreo and vanilla. For the lumps of coal cake pops I made the cake pops out of Oreos and cream cheese! They were so yummy and oh so naughty!

No Bake Oreo Pops 1

  • 1 Family Package Oreo Cookies
  • 6oz Cream Cheese
  • Bakerella’s Gem Mold
  • Parchment Paper
  • Bakerella’s Chocolate Fudge Candy Wafers
  • Black Sanding Sugar
  • Crisco
  • Cake pop sticks
  • Cake pop stand (or Styrofoam)

Grind Cookies in a food processor or blender until there are no big pieces.

In a medium bowl, add cream cheese and use hands to combine cookies and cream cheese until a dough is formed.

No Bake Oreo Pops 2

Fill gem molds with cake pop dough making sure to tightly pack the molds to ensure a smooth pop. Insert into the Fridge for about 20 minutes, until cake pops are hardened.

No Bake Oreo Pops 3

Place formed cake pops on parchment paper, or a non-stick mat like Silpats.

No Bake Oreo Pops 4

Melt candy wafers according to the directions on the bag. Add desired amount of Crisco to thin out the melted wafers.

No Bake Oreo Pops 5

Once Candy wafers are melted, dip cake pop stick ½ inch into melted candy and insert into the bottom of a formed cake ball about 1/3 of the way through. Immediately dip entire cake pop into the melted candy just until the candy touches the stick.

Pull the cake pop out of the candy and gently tap the cake pop stick against the edge of the bowl making sure to spin the pop to have an even coating.

Once excess candy is removed, sprinkle black sanding sugar over the entire cake pop.

L08


I find that using a bowl to catch the sprinkles that don’t make it on to the pop is easier.

No Bake Oreo Pops 6

Use a cake pop stand to dry the cake pops. For your display, you can use a cake pop stand, or a bowl of sugar that looks like the pops are in snow.

L09

You can use a variety of items to jazz up your Coal Pops – bows, ribbon, Washi tape & more!

No Bake Oreo Pops 8

Merry Christmas!

Jenae, Nae B. Sweet
Facebook, Instagram

Mini Christmas Chocolate Bark

Tags

, , , ,

Christmas is just a few more days away, can you believe it? Time flies when you’re a busy baker 🙂

Next in our our Cake Pop Con attendee tutorial series, Maria from Maria’s Buckeyes & Bite-Sized Fun in Ohio, has a really cute (and really easy) idea, especially if you need a quick gift in a pinch!

Hi everyone!

I hope you are having a great holiday season. I have a great idea for gift-giving, and you only need a few ingredients. It’s so easy to do, the longest step is melting the chocolate!

First, you’ll need a silicone mold, preferably in a holiday shape. I found the gingerbread men & Christmas tree molds at Michael’s, and the others at JoAnn Fabric.

Mini Christmas Bark (1)

Ingredients:

  • Two complimentary flavors of candy wafers (ex. chocolate, salted caramel)
  • Crunchy topping (ex. crushed pretzels)

The recipe I’m sharing today is one of my best-sellers, and will surely be a crowd-pleaser for your family and friends.

Start off with Make n Mold Salted Caramel wafers. We received these in our Cake Pop Con swag bags, and they are SO good!

Mini Christmas Bark (2)

Melt your salted caramel melts at half power in the microwave for 30-second increments until melted.

Mini Christmas Bark (5)

It’s easiest to pipe chocolate into the molds. You can use a squeeze bottle or piping bag to fill your molds.  I like to use the piping bag.

Mini Christmas Bark (3)

For my crunchy topping, I used crushed pretzels. You want them broken down into small pieces, but not so much that they’ve turned to dust!

Mini Christmas Bark (4)

Pipe melted caramel into the mold cavities; only about 1/4 of the mold should be filled.

Mini Christmas Bark (6)

Shake your mold so the melts spread evenly over the bottom of the mold cavities.  Put the mold in the refrigerator for about 10 minutes, or until the melts set.

Mini Christmas Bark (7)

Melt your chocolate melts at half power in the microwave for 30 second increments until melted. Pipe chocolate on top of the set caramel layer.

Mini Christmas Bark (8)

Make sure that the mold is only now filled halfway, or a smidge over. You need to leave room for the crunch topping.

Mini Christmas Bark (9)

Immediately sprinkle crushed pretzels on top and push down gently. Do not allow the top chocolate layer to harden, or the crushed topping will not stick. Put the filled mold back in the refrigerator for about 10 minutes, or until chocolate is set.

Mini Christmas Bark (10)

After the chocolate is set, flex the mold, one cavity at a time, and your mini bark will pop right out.

Mini Christmas Bark (11)

Ta da! Chocolate salted caramel pretzel mini bark

Mini Christmas Bark (12)

I also made two other flavors… but the possibilities are endless, get creative!

Chocolate peanut butter M&M mini bark…

Mini Christmas Bark (13)

And chocolate peppermint mini bark!

Mini Christmas Bark (14)

— Hey guys, Kim here, from KC Bakes. Maria’s creative idea inspired me to make some of these mini barks, and it was so fun! Below are the flavor combos I came up with, using Make’n Mold candy wafers:

  • Dark Chocolate, Peanut Butter, crushed Reese’s Pieces
  • Red (vanilla) wafers, White Mint, crushed candy cane

Ginger

  • Dark Chocolate, Salted Caramel, Rice Krispies
  • Cookies & Cream: vanilla wafers, Dark Chocolate, crushed Oreos

IMG_4691

Package your bark in mini mason jars or decorative cello bags and refrigerate.  Enjoy!

Reindeer “Boozy” Cake Pops

Tags

, , , , ,

Today is my birthday! Woohoo! Another year gone by, filled with family, friends, and cake pops 🙂

To help celebrate, Rachel from Sadie Baby Sweets in Ohio, is continuing in our Cake Pop Con attendee tutorial series, by sharing a really clever way to use her CPC swag.

It’s the holiday season and with that comes holiday parties.  If you are lucky like I am, you get invited to an Ugly Sweater Christmas Party.  YAY!

I love parties and I cannot arrive empty-handed. I always have to bring the hostess a gift.  But what could I bring? Something “festive and fun”!

That’s when the idea of Reindeer Boozy Pops was born.  It’s a cheeky adult-themed party, after all.  What a perfectly cute and delicious party dessert, a few bites of chocolate cake pop and a shot of Bailey’s liquor!

Reindeer Boozy Pops 1

These Reindeer Boozy Pops are super easy to make and will surely impress your guests.

Supplies

  • Your favorite cake pop dough, already prepared
  • Chocolate melts
  • Bakerella’s DIY Sugar Eyes
  • Black edible-ink writing marker
  • Cinnamon imperials
  • Candy cane sprinkles
  • Bailey’s liquor
  • Pipettes
  • Paper straws
  • Ribbon

Reindeer Boozy Pops 3


I like to cut my paper straw so that they are 6in long. I think they display nicer this way and they look great through the picture window in my BRP Box Shop Cake Pop Carry Case.

Reindeer Boozy Pops 4

Next, I fill my pipettes.  This takes a little bit of time since you are working against gravity.  I dip the pipette into a shot glass full of the liquor, squeeze to fill and then flip it over with the opening towards the ceiling tapping the bottom on top of a paper towel……repeat these steps until the pipette bulb is completely full.

Reindeer Boozy Pops 5

Then cut the rest of the pipette tube off to about 1/4inch above the body.  I purchased Plastic Transfer Pipettes, 1mL graduated from Amazon for $10.

Reindeer Boozy Pops 6

To prepare the eyes, it is so easy. Bakerella for Make ‘n Mold DIY Sugar Eyes which come with an AmeriColor Gourmet Writer Marker in the package… genius!

Reindeer Boozy Pops 7

Here comes the fun part!  First, melt your chocolate so that you can dip your cake pop.

Reindeer Boozy Pops 8

Then, once the cake pop is dipped you have to work very quickly to attach the sugar eyes, cinnamon imperial red nose and then the pipettes – before the chocolate hardens.

Reindeer Boozy Pops 10

Eyes, nose, pipettes. This is the order that works best for me since I don’t like the chocolate to be “too wet” when inserting the pipettes, since they are a little heavy.

Push the pipettes into the cake pop almost to the bottom curve of the bulb.  Gently hold the pipettes in place until the pop is dry so that they stay where you placed them, instead of drooping or spreading out.

Next, use your edible marker to draw a smile.

Reindeer Boozy Pops 11

I like to dress up the reindeer a bit more by placing candy cane sprinkles in front of the pipettes.  This can be added while the chocolate is still wet or afterward by placing a tiny bit of chocolate melt on the back of the candy cane.

For the finale, add a festive ribbon “scarf” or bow to really complete the look.

Reindeer Boozy Pops 12

Rudolf never looked so snazzy!

Happy Holidays,

Rachel, Sadie Baby Sweets
Facebook, Pinterest, Instagram


Santa Zombie Cake Pops

Tags

, ,

Next up in our Cake Pop Con attendee tutorial series, Lina from Zoe & Pea in New York has a trendy twist on holiday cake pops!

Hi all,

I am Lina, the creative mind behind Zoe & Pea. Today I want to share with you a fun little tutorial, based on this set of cake pops I made for a Plants vs Zombies themed birthday party.

Zombie Santa Cake Pops 1

Kim challenged us Cake Pop Con attendees to use our swag products in a fun way for the holidays. So, allow me to present to you… Santa Zombies! After all, the holidays are for the undead too.

Zombie Santa Cake Pops 2

I wanted to make these as accessible to everyone as possible, so I am using only candy and chocolate.  However, the possibilities for these fellas are endless. Feel free to add fondant decorations, disco dust, sanding sugar, etc. More intricate designs are a bit time consuming, but totally worth the effort.

Today, I am using candy from Miami Candies and paper straws from Aardvark Straws. Thank you Cake Pop. Com sponsors for your generosity.

Supplies:

Zombie Santa Cake Pops 2

  • White, Black and Red Candy melts
  • Lollipop Sticks or Paper Straws
  • Rolled Cake Balls (one full size ball for the head and about half of the ball for the hat)
  • Round white candy in two sizes
  • Black Edible-Ink Marker
  • Toothpicks

Instructions:

Molding the cake balls…

Zombie Santa Cake Pops 4

  1. Starting with full size cake balls, follow your normal preparation of cake dough. For this, I suggest you aim for a playdoh-like consistency. This way, you do not need to chill your cake balls and can work faster. I am using red velvet cake.
  2. Cut one of the cake balls in half.
  3. Shape that half ball to a cone shape. I start with a ball, then pinch one corner to create the tip, and flatten the opposite side.
  4. Take the full ball and create an oval shape. The bottom half of the ball should be thinner, as to resemble a chin. No further molding necessary.
  5. You should end up with an oval shaped ball and a cone shaped ball as in figure 5. Set aside.

Zombie Santa Cake Pops 5

  1. Go ahead and melt your candy melts. You should have four colors: Red, white, grey and black, The grey and the red are your dipping colors, so be more generous in terms of quantity with those. I prepare the grey by adding a few black candy melts to my white candy melts. Set aside

Zombie Santa Cake Pops 6

Assembly:

Zombie Santa Cake Pops 7

  1. Starting with your oval shape, dip the straw or lollipop stick in your grey candy melts and insert in that oval shape until you completely impale the ball and can see a bit of the straw/lollipop stick. In order to preserve that oval cake ball, gently twist the stick as you insert it in the ball.
  1. Dip the cake pop in the grey candy melt.
  1. While the candy is still wet, gently push the larger candy ball in to create an eye socket. I like this technique better because the pressure will add a crease to the chocolate that looks like an eyelid. Proceed with the smaller candy.


  1. Gently twist the cake cone in place, using the excess candy melt already in place as glue.


  1. Using a round candy as mold, create a small crevice for the candy to rest on top of the hat. Allow the chocolate to set or to expedite the process, refrigerate until the candy melts are had to the touch ( about 10 minutes)


  1. Dip the hat on the red candy melts. Shake the excess red chocolate with the cake pop completely upside down to minimize the amount that will fall back to the face of the zombie. While the candy melts are still wet, place the white candy ball on top of the hat. Allow the re candy melt to set, before proceeding to the next step. You could add red sanding sugar to the hat to make it even more festive.


  1. With a toothpick and white candy melts, go around the seam and add the white border. Create a texture by poking the white candy melt with the toothpick.


  1. Add some expression lines and eyebrows by guiding grey candy melt with a toothpick. You could also pipe it.


  1. With black chocolate, add two dots to the eyes and small ovals for the nose. Draw the mouth with the black edible marker.


  1. Add some teeth by piping with white candy melts.


Voilá, you are done!

Before I go, I also want to thank Pick Your Plum, another Cake Pop Con sponsor, for providing us with such amazing and generous disposable tableware. I had so much fun personalizing the chevron green cups and plates for the Plants vs. Zombies event.

Zombie Santa Cake Pops 8


I also used my mini stands from KC Bakes!Zombie Santa Cake Pops 9

I hope you have as much fun creating these little guys as I did. Please let me know if you have any questions.

Happy Holidays to you all,

Lina
Facebook, Instagram, Website

Holiday MacaRONs

Tags

, ,

During Cake Pop Con, I got to know so many talented bakers, and we received so many awesome products from our generous sponsors. Over the next few posts, some of baker attendees will share some creative ideas to bake for the holidays, using CPC Swag!

Holiday MacaRONs
by: Ace Galgana, Cake ‘n Stick (Hawaii)

I. Love. Macarons! They are just so pretty. But so many people are intimidated from by them. Don’t be! I know, they look fancy and complicated – and they can be. However, with my tips, some determination & a dash of patience, we will having you baking gorgeous macarons that will be the envy of every party.

“Learn how to cook – try new recipes, learn from your mistakes, be fearless and above all have fun.” – Julia Child

Now lets get started!

1. Combine and set aside – 1 cup of sifted almond flour and 1 3/4 cup of sifted confectioners’ sugar.

Emphasis on SIFTED. If you skip this process then expect some lumpy macs. Some people recommend you sift your almond flour and powdered sugar together, but I do it separately and it works for me. After I sift, I quickly combine the two with a whisk and set it aside.

1

2. Beat at medium speed until frothy – 3 room temperature large egg whites and 3 tablespoons of sugar. Sprinkle in the sugar while egg whites are beating.

Emphasis on ROOM TEMPERATURE eggs. If you don’t have enough time to set them aside in advance, simply stick them in a bowl of warm water and let it sit for 10 min. Voila! Room temperature eggs!

Drop the egg whites in your mixer. Be careful to not get any yolk in your egg whites! If you do you, it’s easier to just start over. The yolk prevents the egg whites from whipping into a meringue, and it will not allow your cookies to dry completely before you bake them. They will feel tacky and will crack when they are baking. No bueno.

EggWhites

Before your egg whites get to that glossy stage, add your food coloring. For this I used Super Chinese Red by CK Products and Mint Green by Spectrum. Very “Christmassy” don’t you think!?

Continue whipping the eggs until you have medium-soft peaks. Not too soft, not too firm… medium-soft.

7

Next is the “Macronage”, which is the folding process! Crucial step here, folks. Crucial.

3. Sprinkle your powdered sugar and almond flour mixture in your meringue, and fold. Fold, do not mix. Portion your flour mixture into thirds to where you are not dumping all of it into your meringue.

Now, some people say fold it for about fifty strokes, but I don’t. I just “eyeball” it to get it to the “lava” consistency. The more you practice, the better you’ll be able to eyeball it as well.

Folding

This is what you want, “lava-like” batter, so that when you pipe it onto your Silpat Macaron Mat, the batter doesn’t create “nipples.” Seriously, they are really called that. It should fall into a perfect circle with no points or peaks sticking up.

If it doesn’t settle on it’s own and leaves nipples when you pipe, then you under mixed. If it’s runny then you over mixed. Practice getting your batter to the right consistency. Don’t give up!

8

Pour your batter into a piping bag. To make it easier, place the piping bag over a cup, which will support the batter as the bag fills up.

Pipe your batter straight down on to your Silpat Macaron Mat. I seriously love it – my macarons come off so easily and, it already has perfectly printed circles to guide you for the perfect size macs.

9

After piping a full sheet of batter, let it sit!

I know you will be tempted to stick it in the oven right away – but don’t! Let your cookies sit until it forms a firm outer shell on top. If you do not wait for the dry shell to form, they will all crack when you bake them.

I’m saving you a night full of stress, please, wait it out!

10

Bake for about 14-18 minutes at 285F- 305F.

Now, all of our ovens are different, and depending where you live, altitudes and humidity can play a role. It may take a trial batch or two to find that “sweet spot” of what time and temperature work best for you.

In my opinion, there are three things to a successful macaron:

1. A smooth top.
2. Your macaron is not hollow! Hollows are caused by under-cooking your macarons. See how nice and full this mac is?

11

3. Macaron “feet”, which is the spongy looking part that forms at the bottom of the cookie.

12

Let your macarons sit and cool before you peel them off your mat. Again patience. If you don’t wait until they cool, they will stick to your mat. You must wait.

After they are cool, it’s time to fill your macarons! You can use about anything to fill your cookies: ganache, buttercream, jelly, spread – whatever! That’s the beauty of these cookies – there are so many options!

13

To give your macs some extra holiday flair, I decorated mine with Holiday sprinkles and piped decorations on with Bakerella’s Make ‘n Mold Marshmallow White candy wafers.

14

The moral of this holiday story, patience and persistence. Don’t give up! Keep practicing and you will be the HIT at your holiday party!

Mahalo,
Ace Cake ‘n Stick

French MacaRONs

1 cup of sifted almond flour
1 3/4 cups sifted confectioner’s sugar
3 room temperature large egg whites
3 tablespoons of sugar
(Optional) 3 drops food coloring
(Optional) 1/2 teaspoon of flavored extract

  • Combine almond flour and confectioner’s sugar, and set aside.
  • Beat egg whites at medium speed until frothy.
  • Sprinkle in sugar while egg whites are beating.
  • Beat at high speed until medium-soft peaks form. Add food coloring & extract (optional).
  • Combine egg white mixture with flour mixture and fold until incorporated. Fold in until you reach “lava-like” consistency.
  • Transfer into piping bag and pipe 1 1/2 inch circles. Use Silpat Macaron mat for guidance.
  • Allow tray to sit until the batter forms a firm outer shell on top of the cookies.
  • Bake 14-18 minutes at 285-305F.
  • Allow cookies to fully cool before removing them from the mat.
  • Decorate & enjoy!

mac collage